Bryant Labs
Seismology - Vertical Seismometer Spring Details

Many people have asked for details of the spring installation. Hopefully, this
page will help. When installed and working, the spring is bent into a
"C" shape so that is will exert a force
pushing the ends apart in an effort to straighten itself. The ends do not
just push on the base and the underside of the boom. If they did, there would
be some noise caused by the motion as they slid around. Instead, each end works
through a flexure,
pulling on a brass rod, which is captured by a bracket at each end. The
bracket is attached to either the base directly (at the bottom end),
or to a short boom mounted at right angles to the main boom on the upper end.
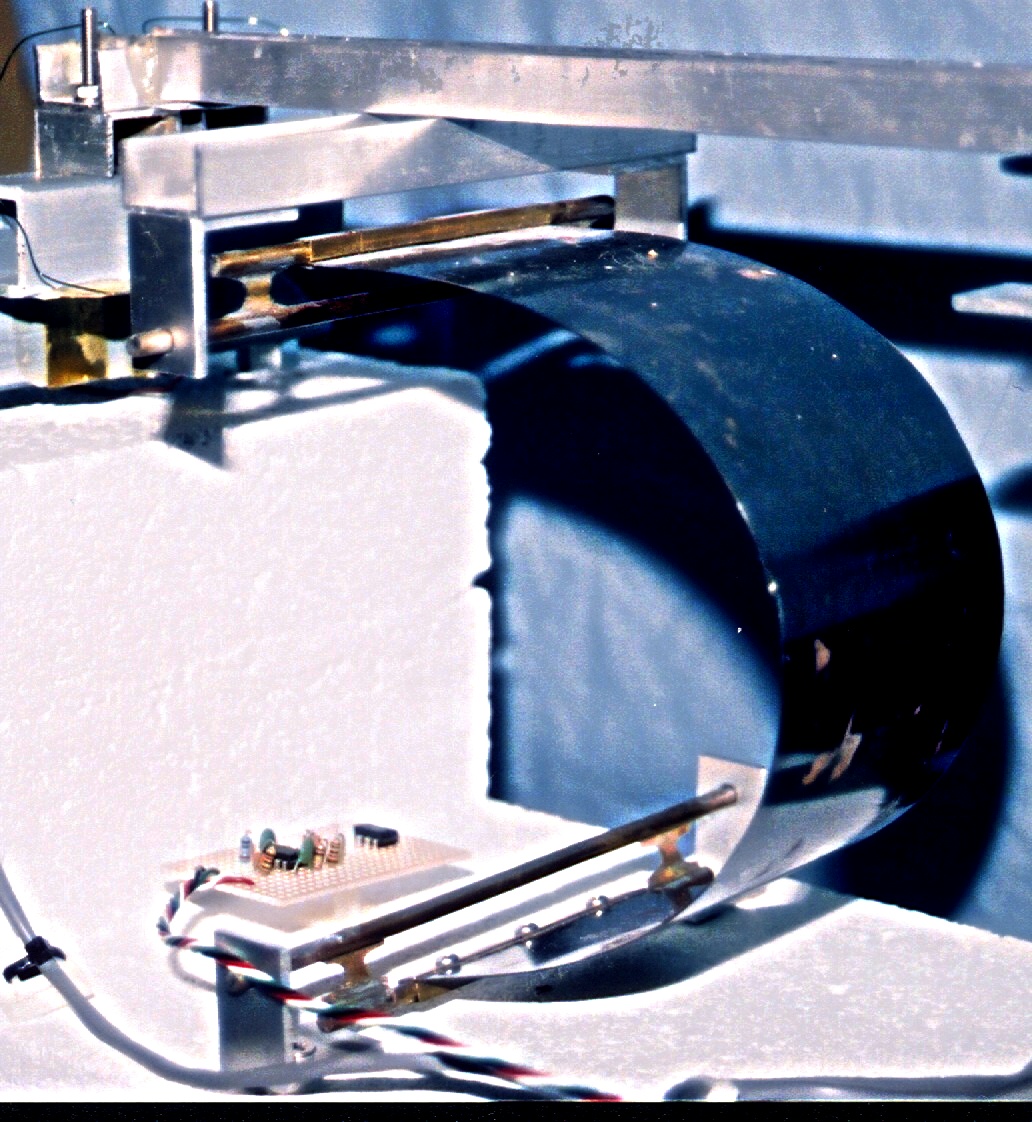
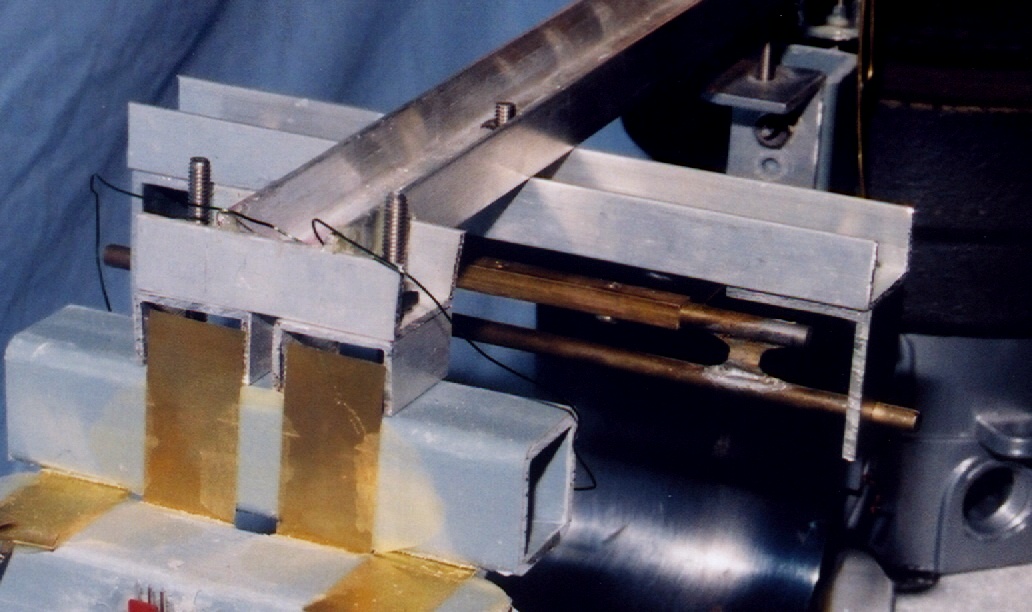
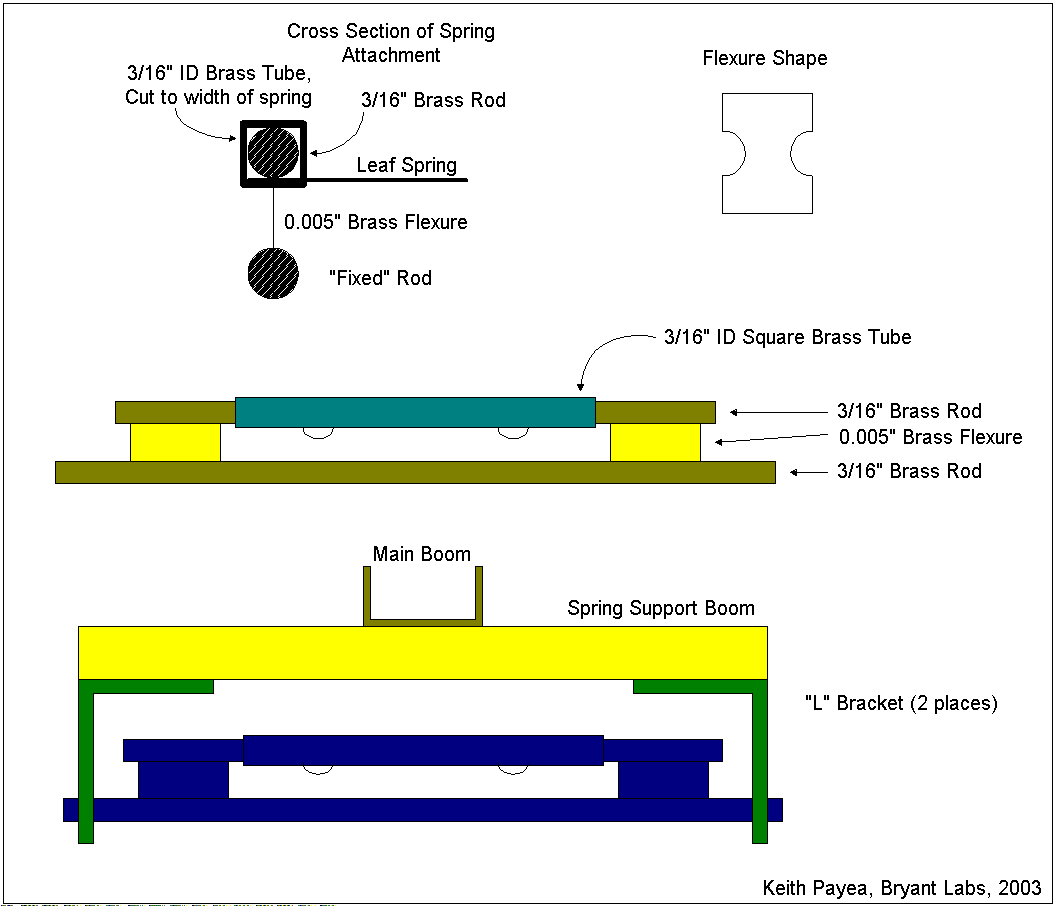
Maybe the easiest way to understand is to walk through the steps needed to
build this sub-assembly. Refer to the pictures above and the following drawing
to help with the details. The drawing isn't exact, or to scale. It's just
meant as an aid to understanding the pictures.
- Go to your local home improvement store and buy a 12" drywall taping
knife with a 3 inch wide spring steel blade.
- Remove the spring from the handle. I used a Dremel abrasive disk to
do this. Spring Steel is hard to cut any other way.
- Make two holes for number 4 screws along both short sides of the spring.
Again, I used a Dremel tool, this time with an abrasive cone.
- Cut two pieces of 3/16" brass rod. Make one 5" long and
the other 7" long
- Cut a piect of 3/16" ID square Brass Tubing the same width as the
spring - about 3 inches.
- Use a very fine X-Acto saw or jeweler's saw to cut a slit the entire
length of the tube along one corner. When you are done, you should be able
to slip this tube over the end of the spring so that the spring is pressed
against one of the inside surfaces of the tube.
- Now take the shorter brass rod and file a flat along it until it will
fit inside the tubing with the spring in place.
- Drill two pilot holes through the tubing and the rod to coincide with the
two holes you made in the spring. Tap the holes in the brass rod for 4-40
screws
- Before assembling this with screws, use the jeweler's saw to make a slit
in each end of the brass rod, at right angles to the flat you filed in it,
1" long.
- Assemble the spring, tubing, and rod with two short 4-40 screws, brass if
possible.
- Cut two pieces of brass shim stock, 0.005" thick, 3/4" wide,
and 1" long. Make a cutout in each long edge as in the drawing above.
- Solder a piece into the slit in each end of the brass rod. The flexure
should extend out toward the heads of the two screws.
- Use the jeweler's saw to cut a slit in each end of the long brass rod.
This slit needs to be long enough to engage the flexure from the short rod.
- Solder the flexures into the slits in the long rods. Keep the two rods
as parallel as possible, and approximately 1/2 inch apart.
- Make an "L" bracket from a piece of Aluminum angle stock. The
angle needs to be wide enough to allow room between the shorter "floating"
rod and the longer "fixed" rod.
- Drill a 3/16" hole in one flange of the bracket. Drill whatever holes
you need in the other flange to mount the bracket.
- Mount the bracket to the boom and base of the seismometer. I placed these
such that I could slip one end of the fixed rod through the hole in one bracket,
far enough to allow the other end of the rod to slip inside of the other
bracket. Then slide it back to center it on both brackets. When
completely installed, there's enough tension on everything to keep it in place.

Back to the Vertical Seismometer Page
Back to Bryant Labs Seismology Page
Back to Bryant Labs Home Page
Last Revised: 19-June-2003